Disclosure: this article contains affiliate links. If you buy through them, Time’s Ripple may earn a commission at no extra cost to you. Product details come from the maker’s published product pages and policies, checked in October 2026. How this site handles affiliate links.
A shrimp tank setup is cheap to put together and easy to keep once it settles. When a first colony fails, it usually happens in the first two weeks. The common causes are few. The tank was never cycled, the shrimp went from the bag into different water too fast, or a treatment containing copper went in unread.
This guide is about Neocaridina shrimp, the group that includes red cherry shrimp and the blue, yellow and black color forms sold beside them. They are the usual first shrimp because they handle a wide range of water. Caridina species such as crystal red shrimp need softer, more tightly controlled water and are a different project.
The steps run in the order you would do them: tank, filter, heater, substrate and plants, water, cycling, then adding the shrimp and keeping them. A troubleshooting table covers the common causes of losses, and the checklist near the end fits the whole setup into eight lines you can tick off before you buy livestock.
The short answer
Start with a 5 to 10 gallon tank, a sponge filter on a small air pump, a lid, live plants or moss, and a heater only if your room drops below about 70°F. Cycle the tank until ammonia and nitrite both read zero. Then add at least 10 Neocaridina shrimp, acclimate them slowly by drip, and feed lightly.
Links in this box are affiliate links. Prices and stock are from hygger’s US store on October 18, 2026 and change often. Full details and trade-offs are in the hygger section below.
Neocaridina shrimp spend much of the day grazing and gather quickly around food. Photo by Yash Gupta on Unsplash
What a shrimp tank setup needs
The equipment list is short, and most of it costs less than the shrimp.
Item
Why it matters for shrimp
Notes
Tank, 5 to 10 gallons
More water changes more slowly, and shrimp handle slow change well
A lid is worth having (see section 4)
Sponge filter and air pump
Newborn shrimp are about 2 mm long and can be pulled into a normal filter intake
Or fit a pre-filter sponge over a hang-on-back intake
Heater (sometimes)
Needed only if the room runs cool
Pick one with a thermostat and a guard
Substrate
Gives plants roots and gives shrimp a surface to graze
Plain gravel or sand is fine for Neocaridina
Live plants or moss
Grow the film of algae and microbes shrimp feed on, and give molting shrimp cover
Moss, floating plants and small stem plants are common choices
Light
For the plants; shrimp do not need it
A small clip-on LED on a timer is enough for easy plants
Water conditioner
Tap water often contains chlorine or chloramine
Use one that says it treats chloramine
Test kit
Shows when cycling is done, and what your GH and KH are
Strips for quick checks, liquid tests for ammonia and nitrite
1. Choose the tank size
Neocaridina are small. Aquarium Co-op notes that females can reach about 1.5 inches and males about 1 to 1.25 inches. A colony can live in a 2-gallon nano tank, but Aquarium Co-op uses 10 gallons or more for a breeding colony, and a 5 to 10 gallon tank is a sensible first choice for a shrimp tank setup.
The reason is stability. A small volume of water heats and cools quickly, and a missed feeding or a dead snail shifts the water chemistry faster. Shrimp cope with less-than-perfect numbers far better than with sudden swings, so the extra gallons buy you room for mistakes.
Shrimp live on the bottom and on plants, so a long, low tank gives them more room than a tall one of the same volume.
2. Pick a shrimp-safe filter
The filter choice matters more for shrimp than for most fish. Newborn shrimp are about 2 mm long, according to Aquarium Co-op, and a hang-on-back or internal filter with an open intake can pull them in. Both Aquarium Co-op and The Shrimp Farm recommend a sponge filter, or a power filter with a sponge pre-filter on the intake.
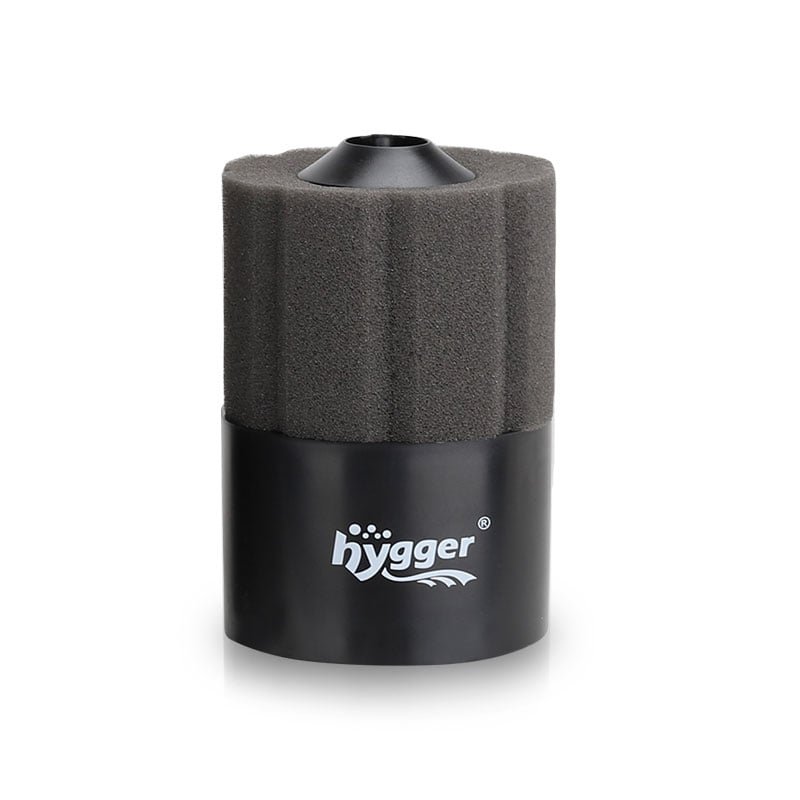
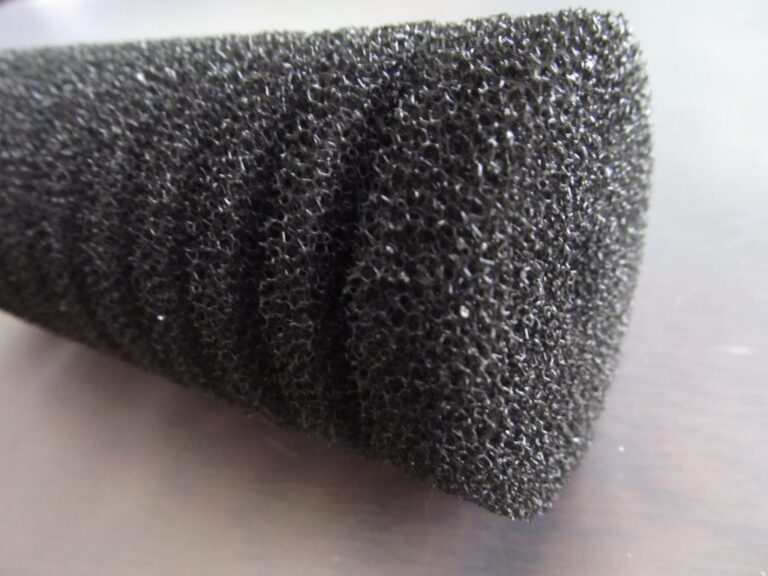
A sponge filter runs on an air pump. Rising bubbles pull water through the sponge, where bacteria break down ammonia and nitrite. Shrimp also graze on the sponge surface.
Two practical points. Sponge filters need a separate air pump and airline tubing, and the pump should sit above the water line or have a check valve so water cannot run back into it. When you clean the sponge, squeeze it in a bucket of old tank water, not under the tap. Chlorinated tap water kills the bacteria the sponge exists to hold. My sponge filter guide covers how to size the filter and pump, how to set it up, and what to do when the bubbles slow down.
3. Decide whether you need a heater
Many shrimp tanks run without one. Aquarium Co-op says cherry shrimp can live between about 60 and 82°F (16 to 28°C) and are most comfortable at 72 to 76°F (22 to 24°C). The Shrimp Farm gives a similar acceptable range of 65 to 80°F. If your room stays in the low 70s day and night, a shrimp tank can do without a heater.
Use a heater if the room drops below about 70°F or swings a lot between day and night. Aquarium Co-op notes that shrimp grow faster in warmer water but live shorter lives, so set it in the low-to-middle 70s.
Choose a small heater with a thermostat and a guard, because shrimp like to perch on equipment. My betta fish heater guide covers sizing, safety features and placement for tanks of this size, and the aquarium heater size calculator works out wattage from your tank and room temperature. If you are weighing the running cost, this breakdown of fish tank electricity use shows what a small heater adds to the bill.
4. Substrate, plants, light and a lid
Substrate. Neocaridina do well on plain aquarium gravel or sand. Plant soils (often sold as “active” substrates) lower pH and soften water, which some Caridina species need, but which you do not need for cherry shrimp. If you use one, expect the water to read differently from your tap for months, and test before you add shrimp. A bare-bottom tank works too, but it is harder to grow plants in.
Plants and moss. This is where shrimp get most of their food. Every surface in a tank grows biofilm, a thin coat of algae and microbes, and shrimp spend most of the day picking at it. Plants add a lot of that surface. They also give shrimp somewhere to hide after a molt, when the new shell is still soft. Java moss and floating plants are common picks in shrimp tanks. Fertilizers need care; see section 5 on copper.
Light. Shrimp do not need light, but the plants do. Easy plants and moss grow under a small LED. Many keepers start with the timer at 6 to 8 hours, enough for easy plants without feeding much algae; my planted aquarium light guide explains how to match a light to the plants you choose.
Lid. Shrimp can climb out, and keepers often report it happening after a large water change or when something in the water is off. A lid, or a gap-free cover around the filter tube, stops a dried shrimp on the floor and is also an early warning: shrimp trying to leave usually means the water needs testing.
5. Shrimp tank water parameters
Neocaridina tolerate a wide range. Stable water matters more than any single number, and every guide below says the same. These are the ranges worth knowing:
Measure
Range for Neocaridina
Where the number comes from
Temperature
Comfortable at 72 to 76°F (22 to 24°C); tolerate about 60 to 82°F
Aquarium Co-op
pH
6.5 to 8.5
Aquarium Co-op (hygger’s listing says 6 to 8.2)
GH (general hardness)
At least 6 dGH (about 110 ppm)
Aquarium Co-op
KH (carbonate hardness)
At least 2 dKH (about 40 ppm)
Aquarium Co-op
TDS (total dissolved solids)
Roughly 150 to 300 ppm
A range many keepers aim for, not a fixed rule
Ammonia and nitrite
0
Any reading means the tank is not ready
Nitrate
As low as you can keep it
Many keepers aim for under 20 ppm
GH is the number beginners miss. Shrimp grow by shedding their shell, and they need dissolved minerals to build the next one. Aquarium Co-op links very soft water to failed molts and suggests mineral supplements if your GH is low. Test your tap water once before you set anything up. If it is already in range, you may never need to add anything.
Copper is the number that kills. Shrimp are far more sensitive to copper than fish. Some fish medications and algae treatments use copper as the active ingredient, and The Shrimp Farm advises against dosing plant fertilizers in tanks with cherry shrimp because many contain copper. Read the label of anything you add. If a product lists copper, keep it out of the shrimp tank.
Tap water. Use a water conditioner that treats both chlorine and chloramine, since many US water systems use chloramine. Match the temperature of new water to the tank before you pour it in.
6. Cycle the tank before any shrimp go in
Cycling grows the bacteria that turn ammonia from waste and food into nitrite and then into nitrate, which is far less toxic. A new tank has almost none of these bacteria. Shrimp are a small bioload, but they are sensitive, so they should go into a tank that has already cycled. This is the step a first shrimp tank setup most often skips, and the one that matters most.
The usual method is a fishless cycle. Add a small source of ammonia, such as a pinch of fish food or a bottled ammonia product dosed to its label, plus a bottled bacteria starter if you like. Test every few days. Ammonia rises, then nitrite rises as ammonia falls, and finally both drop to zero while nitrate appears. That process often takes several weeks.
The filter has caught up once a fresh dose of ammonia is gone, with nitrite at zero too, within 24 hours. Do a partial water change to bring nitrate down, then you are ready for shrimp.
A used sponge from a healthy, established tank carries bacteria with it and can cut the wait a lot. Many shrimp keepers also wait a few extra weeks after the cycle ends, so more biofilm builds up for the shrimp to eat.
7. How to add shrimp to a new tank
How many to start with. Aquarium Co-op suggests at least 10 Neocaridina, which should give you both males and females. A group also hides less and is easier to watch.
Drip acclimation. Shrimp react badly to sudden changes in water chemistry, so most shrimp sellers and keepers recommend dripping tank water into the shrimp’s water slowly. Shrimp Science describes the method like this:
Dim the tank and room lights.
Float the bag in the tank, or set it beside the tank, until the temperatures match.
Pour the shrimp and their water into a clean container placed lower than the tank.
Run airline tubing from the tank (or a jug of tank water) into the container, start a siphon, and tie a loose knot or fit an airline valve to slow it.
Aim for about 1 to 2 drops per second.
Keep going until about three-quarters of the water in the container is tank water. That usually takes 1 to 2 hours. Go slower if your water is very different from the seller’s.
Net the shrimp into the tank. Pour the container water away rather than into the tank.
Expect the shrimp to hide for a day or two. Many keepers skip food on the first day, since the shrimp have biofilm to graze.
8. Feeding, water changes and tank mates
Feeding. In a planted tank, shrimp find much of their own food. Add a small amount of shrimp food a few times a week, and remove what is left after a few hours. The Shrimp Farm treats algae as the main food and other foods as a supplement. Aquarium Co-op recommends shrimp foods with added calcium and occasional blanched vegetables. Leave molted shells in the tank; shrimp eat them and recover some of the minerals.
Water changes. The Shrimp Farm says changing about 20% of the water monthly is enough for a cherry shrimp tank, as long as it is not overfed. Many keepers prefer smaller changes, such as 10% every week or two, because a small change shifts the water less. Either way, match the temperature and treat the new water before it goes in.
Tank mates. Aquarium Co-op notes that almost all fish will eat baby shrimp, and many will eat adults. For a colony that grows, a shrimp-only tank is the safe choice. Snails are fine company. Small, peaceful fish such as otocinclus or chili rasboras are often kept with shrimp, though shrimplets will still go missing. Bettas are a gamble; some ignore shrimp and many hunt them. If you have a betta, my betta tank setup guide covers what else works in its tank.
9. Why shrimp die in a new tank
Losing a shrimp or two in the first week happens even with care. Steady losses usually trace back to one of these:
What you see
Likely cause
What to check
Several deaths in the first day or two
Acclimation too fast, or water very different from the seller’s
Drip acclimate next time; compare GH, KH and pH with the seller’s water if you can
Deaths one by one over weeks
Ammonia or nitrite from an uncycled tank or overfeeding
Test ammonia and nitrite; cut back on food
Shrimp stuck halfway out of an old shell
Failed molt, often linked to low GH or sudden swings
Test GH; make water changes smaller and temperature-matched
Sudden deaths after adding a product
Copper or another treatment toxic to invertebrates
Read the label; do a large water change; add activated carbon or a copper-removing filter media
Shrimp climbing out or swimming frantically
Something is wrong with the water
Test straight away, and check the heater
If you see fuzz, worms or unusual spots on shrimp, separate them if you can and ask a knowledgeable local fish store or a vet who treats aquatic animals before using any medication.
hygger sells live Neocaridina shrimp as well as aquarium equipment, so the shrimp and the gear can come from one US store. Its sponge filter listing gives the maximum tank depth and the minimum air pump wattage for each size, and its small heaters list the tank sizes they suit. Those are the details to compare on any brand’s shrimp gear.
Shipping and live arrival
Shipping from hygger’s US store is free within the contiguous United States. Alaska, Hawaii, territories, P.O. boxes and military addresses are not covered. For the shrimp, the listing has its own live arrival guarantee: send proof of any shrimp dead on arrival and hygger pays US$1.50 for each one, not counting the bonus shrimp. Return and warranty terms for the equipment are laid out in the hygger section of my betta tank guide.
Shrimp, filter and air pump
The shrimp:Mixed Neocaridina Shrimp Assortment (HC016). It comes in packs of 10, 20 or 30, priced at $33.99, $38.71 and $47.51 on October 18, 2026. The mix covers cherry, Blue Velvet, Sunkist, Black Rili and Golden Back shrimp of about 1.5 to 2 cm, and hygger adds 2, 4 or 6 bonus shrimp depending on the pack. It had 61 reviews averaging 4.95 on hygger’s store. Check current price.
The filter:Aquarium Biochemical Sponge Filter. The Small size, for 5 to 20 gallon tanks under 14 inches deep, costs $13.99; Medium and Large are $15.99 and $20.99. The listing names shrimp tanks among its uses. It needs an air pump of at least 1.5 watts for the Small size, sold separately. It had 29 reviews averaging 4.93. Check current price.
The air pump:Mini Air Pump, $15.99 to $16.99. It draws 1.5 watts with a rated flow of 420 ml per minute, which meets the Small filter’s minimum. Tubing is included. The maker says to keep it above the water line or fit a check valve. Check current price.
Heater, light and test strips
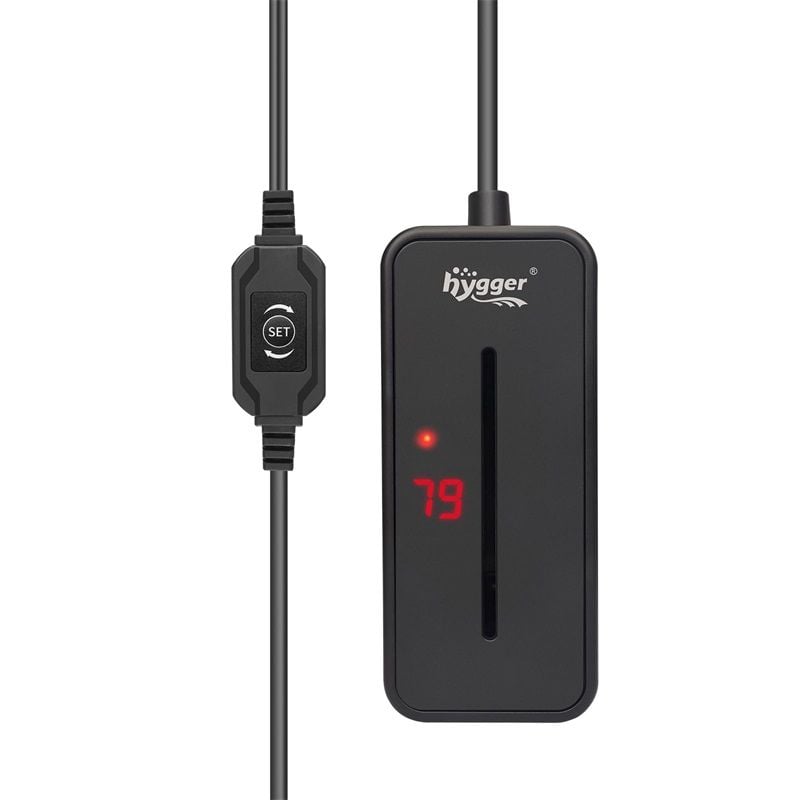
The heater, if you need one:Tiny Titan Water Heater (HG045). It costs $18.99 for the 25-watt version (2 to 5 gallons) and $20.99 for the 50-watt version (5 to 10 gallons). The listing names shrimp tanks among its uses. It has a removable plastic guard, an external knob that sets 59 to 93°F, and an LCD showing the water temperature. Check current price.
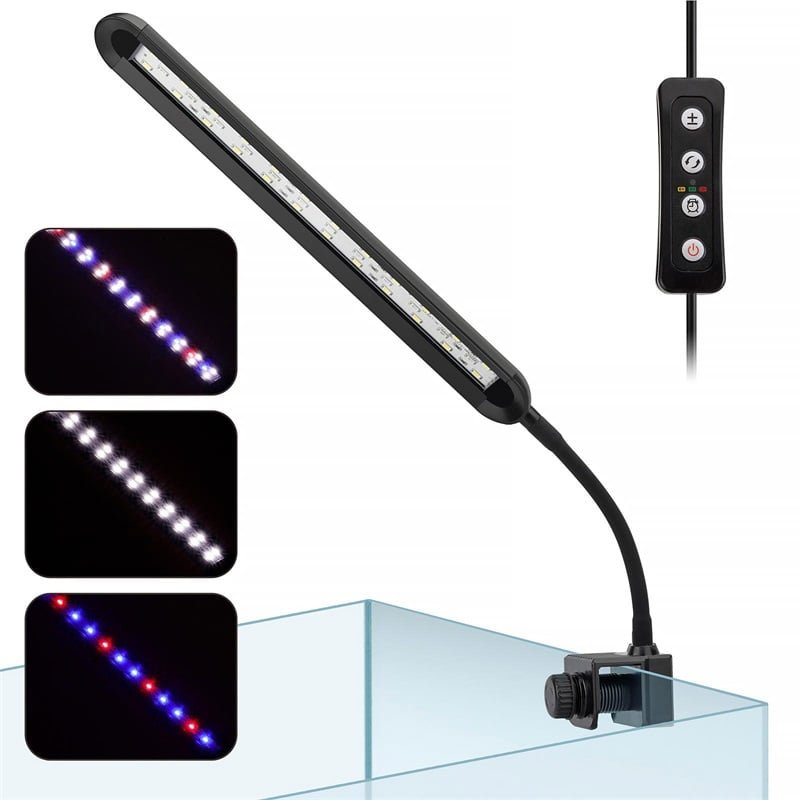
The light:Aquarium Mini Clip On Light. The 6-watt version suits tanks 8 to 12 inches long ($18.99), the 9-watt 12 to 16 inches ($22.99) and the 14-watt 16 to 21 inches ($25.99). It has a built-in 6, 9 or 12-hour timer that remembers its settings through a power cut. hygger pitches it at low-to-moderate plants. Check current price.
The test strips:8-in-1 Aquarium Water Test Kit (HG006), $9.99 for 50 strips or $13.99 for 100. The product page confirms it reads ammonia, pH, GH and KH among its eight measures. Check current price.
Mixed Neocaridina ShrimpBiochemical Sponge FilterTiny Titan Water HeaterMini Clip On LightImages: hygger, from its product pages.
Ordering shrimp and equipment together is convenient, and the sponge filter listing gives the depth and air pump numbers you need to size it. The shrimp reviews are strong, with 61 reviews averaging 4.95. There are limits, though. The assortment is mixed: if you want one color to breed true, a single-color group from a breeder suits you better, because keepers commonly report that mixed colors bred together drift toward duller shrimp over a few generations. The dead-on-arrival payment is $1.50 per shrimp, less than the roughly $1.58 to $3.40 each you pay depending on the pack. The sponge filter needs an air pump bought separately, and test strips are fine for quick checks but less precise than liquid tests while you are cycling.
If this is not the right fit
If there is a shrimp keeper or fish store near you, buying locally means a shorter trip and a chance to ask what water the shrimp were kept in. Matching that makes acclimation easier.
If you want one color, look for a breeder who sells a single line, such as red cherry or blue dream, and keep only that line in the tank.
If you are drawn to crystal red or other Caridina shrimp, start with Neocaridina first. Caridina need soft water made from RO water and remineralizer, and an active soil to hold the pH down.
Shrimp tank setup checklist
The tank holds 5 to 10 gallons and has a lid or cover.
The filter is a sponge filter, or the intake has a pre-filter sponge.
I know my room temperature, and I have a heater with a guard if it drops below about 70°F.
There are live plants or moss, and the light runs on a timer.
My tap water’s GH, KH and pH are known, and my conditioner treats chloramine.
Ammonia and nitrite have read zero for several days, a day after each ammonia dose.
Nothing in the tank or in my cabinet of treatments lists copper on its label.
I have a container and airline tubing ready to drip acclimate at least 10 shrimp.
Frequently asked questions
Do shrimp tanks need a filter?
Yes, for a beginner. The filter holds the bacteria that process waste. Use a sponge filter, or a pre-filter sponge on another filter’s intake, so baby shrimp are not pulled in. Some experienced keepers run heavily planted tanks without one, with less room for error.
Do cherry shrimp need a heater?
Only if the room runs cool. Aquarium Co-op puts their comfort zone at 72 to 76°F. If your room stays in the low 70s, an unheated tank works; below about 70°F, use a small heater with a thermostat.
How many gallons do shrimp need?
Aquarium Co-op notes that cherry shrimp are small enough for a 2-gallon nano tank, but 5 to 10 gallons is easier to keep stable. Aquarium Co-op uses 10 gallons or more for a breeding colony.
How long does it take to set up a shrimp tank?
Plan for several weeks before the shrimp arrive, mostly for cycling. A sponge from an established tank can shorten that.
Can cherry shrimp live with a betta?
Sometimes. Some bettas ignore shrimp and others hunt them, and you cannot tell which until you try. Dense plants and moss help, and baby shrimp will still be eaten. If you want the shrimp population to grow, keep them in their own tank.
Do shrimp tanks need a lid?
It is a good idea. Shrimp can climb out, especially after a big water change or when the water quality slips. A lid prevents losses and makes escapes easier to notice.
Slow and steady wins with shrimp
A shrimp tank setup rewards patience more than equipment. Cycle it fully, add the shrimp slowly, feed less than you think you should, and keep every change small. A tank set up that way usually needs little more than topping up, a light feed and a look each evening.
Photos: ק. פ. and Yash Gupta on Unsplash; they show Neocaridina shrimp in general, not the products in this article. Product images: hygger. Product details: hygger’s product pages and store data, checked on October 18, 2026. Policies: hygger’s shipping policy and the shrimp listing’s live arrival terms, checked in October 2026. Care ranges: Aquarium Co-op’s cherry shrimp care guide and The Shrimp Farm’s cherry shrimp care article; acclimation steps: Shrimp Science. These are widely used guidelines for keeping Neocaridina, not fixed rules; if your shrimp seem unwell, ask a knowledgeable local fish store.
M. Caelestis is the pen name of the editor of Time’s Ripple. Aquarium articles here are researched from manufacturers’ product pages and policies, widely used fish-care guidelines and public reviews, and checked against those sources on the date given in each article. Products are not hands-on tested unless an article says so.